One bad wall can make a good control system look broken. When a SpaceLogic sensor sits in sun, draft, or a dead-air corner, the room starts telling the BAS the wrong story.
Then false comfort complaints start piling up. Occupants blame the controls, while the real problem is often a rushed install, a poor wall location, or one loose conductor.
The job goes better when the team treats the sensor like a measuring device, not a plastic box on a finish wall. Start with the prep, because that’s where most avoidable mistakes begin.
Table of Contents
What to check before installing a SpaceLogic sensor
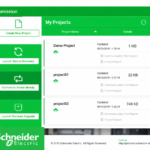
Confirm the sensor model and the job site plan
Before anyone opens the box, match the sensor model to the point list, controller type, and room use. Some SpaceLogic devices only read room temperature. Others add humidity, setpoint, occupancy, or bus communications. Those differences change the wiring, address plan, and even the right wall location.
Download User Guide
Keep the submittal, the control drawings, and the room schedule together. If the room use changed during fit-out, fix the plan before the install starts. A sensor picked for a private office may not suit a lobby, conference room, or mixed-use space.
Gather the right tools, cable, and hardware
Set the parts out before you head to the ladder. Most wall installs only need a small kit:
- A terminal screwdriver
- A level
- A cable stripper
- Mounting screws and anchors
- The right low-voltage cable
- Labels or a marker
The cable matters. Bus-connected sensors often call for Cat 5 or better, 8-conductor, unshielded, straight-through cable. If the model lands on screw terminals, check the allowed conductor size, often 22 to 26 AWG. Before you leave the shop, compare the cable and terminal type with Schneider’s SpaceLogic sensor instructions so nobody shows up with the wrong lead or hardware.
Shut down power and make the area safe
Even low-voltage work needs a clean safety routine. Shut down the affected circuit, verify power is off, and follow site lockout rules. Then look at the work area like the person who has to come back later.
Check ladder access, ceiling clearance, nearby moving equipment, and any heat source that could affect the device. Good access makes neat wiring easier, and neat wiring makes future service faster.
How to mount a SpaceLogic sensor in the best spot
Choose a wall location that reflects the room, not the edge of it
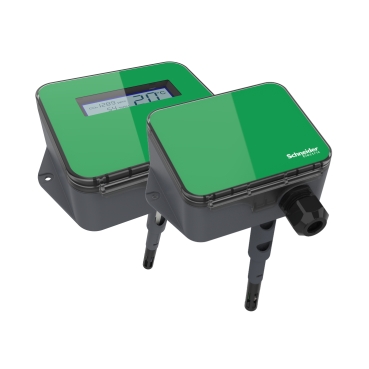
For a wall-mounted room temperature or humidity sensor, mount it vertically about 1.35 m (4.5 ft) above the floor. That sits inside the usual breathing zone, which is why it often tracks how the room feels to people. A specialty gas sensor can be different, so follow that model’s instructions if the device measures anything other than room air.
The bigger rule is simple. Measure the room, not the edge of it. Pick an interior wall with normal airflow. Stay clear of direct sun, supply diffusers, return grilles, exterior walls, door swings, copier heat, and the patch of wall beside a busy doorway.
A sensor on the wrong wall can be wired perfectly and still report the room badly.
If the only open wall sits near a problem source, note that condition before the install. That note may explain later why one zone drifts warm every afternoon.
Mount the backplate firmly and keep the sensor level
Hold the base in place, level it, and mark the holes. Use at least two screws so the backplate doesn’t twist when the cover snaps on. On drywall, add anchors if there isn’t a box or solid backing.
Keep the base flat to the wall. A rocking backplate can stress terminals, leave gaps at the cover, and make a good install look sloppy.
Route the cable cleanly before closing the housing
Bring the cable through the back opening or plate without sharp bends. Leave enough slack for termination, but don’t stuff a knot of spare cable into the housing. You want room to land the wires and close the cover without pinching anything.
If your site also ties field devices into older twisted-pair segments, this note on SpaceLogic twisted pair adapters helps the controls team plan those network paths. At the wall, the goal stays simple: neat cable, no strain, no surprises when the cover goes on.
Wire the SpaceLogic sensor without common mistakes
Connect the conductors to the right terminals
Match each conductor to the terminal marking, and trim the jacket so only the needed length shows. Loose copper, crossed pairs, and stray strands are small mistakes that create long afternoons. A reviewer should be able to glance at the wiring and see order, not guesswork.
Seat the wire fully, then tighten the screw until it is snug. Don’t over-tighten it. Too much force can damage the terminal or nick the conductor. Before you close the unit, tug each wire lightly and compare the landing to the diagram. If your team is working with an SLA-series wall unit, the SLA sensor installation guide is a handy reference for the base and cover layout.
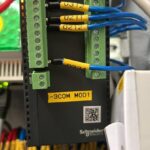
Handle Sensor Bus and RS-485 connections the right way
Bus jobs need discipline. Use the cable type listed for the sensor. For many SpaceLogic bus-connected models, that means Cat 5 or higher, 8-conductor, unshielded, straight-through cable. Keep the sensor bus within 61 m (200 ft) unless the project documents call for something else.
Follow the bus layout on the drawings. Some sensors home-run to the controller. Others daisy-chain to the next sensor, and the bus ports may be interchangeable. What matters is that the field wiring matches the design, not a guess made at the wall.
RS-485 links need the same care. Keep polarity consistent, land the wires cleanly, and don’t mix in crossed patch cords because they are lying around in the van.
Set unique addresses before power-up checks
Address conflicts can make a healthy sensor look dead. Before power-up, set each bus-connected device to its own DIP switch address and write that number down on the drawing or startup sheet.
Don’t leave this for commissioning day. When two sensors claim the same address, the symptoms can look random. Points may vanish, values may jump, or one sensor may appear only when another drops offline.
Finish installation, test the reading, and hand it off cleanly
Reassemble the cover and lock the unit if required
After the wiring check, fit the top tabs first. Then swing the cover down until it latches. If the model uses a locking screw, install it now instead of leaving it for punch list day.
Watch the flex cable or internal connector as the cover closes. Don’t trap it behind the housing or fold it into a hard crease.
Check the sensor reading against the room conditions
Power the circuit back up and give the sensor a few minutes to settle. Then compare the reported value with the room conditions. You are looking for obvious trouble, not lab-grade calibration at the wall.
If the space feels normal but the point reads far off, start with the simple causes. Sunlight on the wall, air from a diffuser, crossed conductors, a bad address, or a loose cover can all skew the reading. On mixed room-control jobs, Schneider’s SpaceLogic KNX sensor guidance can help the team confirm how sensor values fit into the wider room setup.
Document the install for future service visits
Finish with a clean handoff. Label the sensor location, note the address, record the controller point, and save a photo of the final wiring if site policy allows. Add any special note about wall conditions, such as afternoon sun or a nearby diffuser.
That small record trims service time later. The controls team can commission faster, and the building operator doesn’t have to guess which device sits behind “Conference Room West” in the graphics.
Good sensor installs don’t announce themselves. The room stays comfortable, the trend looks believable, and nobody spends Friday afternoon chasing a problem caused by one bad wall location.
For building teams, the pattern is simple: accurate placement, tidy wiring, and a short final check. Do that on the first pass, and the SpaceLogic sensor becomes part of stable comfort control, not the source of the next callback.